
What is iMessage?
iMessage is the Instant Messaging service by Apple for its devices like iPhone, iPads and Mac. Started in 2011 with iOS 5, iMessage works between Apple devices only. iMessages use wifi or cellular data to send and receive messages.
When sending text messages via iMessage, the mobile device’s Messages app will first identify the recipient of the message prior to sending, and automatically send the messages via iMessage if the recipient’s device uses iOS 5 (or later) or via the sender’s regular text messaging service if the recipient doesn’t have an iOS 5-powered device.
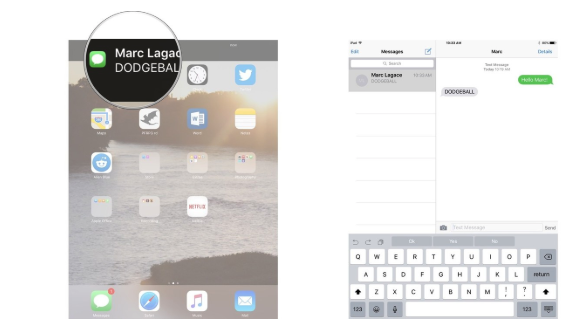
Users can easily distinguish messages sent via iMessage, as message replies appear in a blue-shaded bubble as opposed to the Messages app’s standard green-colored bubble.
Users of iMessage-capable devices can send an unlimited number of messages for free via iMessage. In addition to sending text messages, iMessage also supports sending photos, videos, Web links, contacts and location information. iMessage can also be used to send group messages to multiple people.
What is the difference between iMessage and Text Messages?
iMessages are different from normal text messages (SMS, MMS) as they use internet for communication. You cannot send an iMessage to a person with, say an Android phone. It is exclusively designed for Apple users.
The idea of using Wifi or cellular data to send messages feels very similar to email but iMessages use the person’s number or Apple ID and are very fast. Email is generally used for messages that do not require instant response. However, iMessage is an instant messaging service and is more like a chat box with messages flowing in and out rapidly. However, it does not provide instant video chat, we have a different app for that – Face Time!

Another distinguishing factor about iMessages is that it offers recipient status. You will get to know the status of your message if it is sent, delivered or read. Normal text messages sent through your carrier do not provide these statuses.
How to activate iMessages?
It is quite simple to activate iMessage. Simply go to Settings, then go to Messages and activate iMessage option. But there is a catch with iMessages. If you do not have internet connectivity or the network is not responding, your iMessage would not go to the recipient.
In such a case you can force the message to be sent through SMS. Simply tap and hold the text message then select ‘Send as text Message’ from the menu that appears. Your message will then be sent as a text message. But you can also apply this feature through settings.
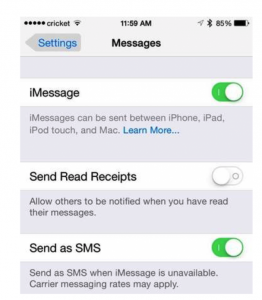
Once you activate iMessage, also activate the option “Send as SMS” just under the iMessage option in Message Settings. Now, your iMessages will automatically go as text messages should there be some problem with the internet connectivity.
How to connect iMessages with your Apple ID and Phone Number?
For Mac and iPads, iMessages use your apple ID. Your messages will be sent and received through your apple ID. However, if you have an iPhone and would like to receive messages sent to your number, you can simply add your number to your Mac or iPad.
On Mac, sign in to your messages account. Go to Messages then Preferences, then go to Accounts and add your number. You can select your number in ‘you can be reached’ option.
On the iPad or iPod, go to Settings then Messages. Tap Send & Receive then add your number. If you want to remove your number, simply follow the same path and remove the number.
What can be sent over iMessage?
The types of data you can send via iMessages make it even more useful. It is not just limited to text messages; you can send pictures, videos, documents, contacts, voice memo, locations and even have group conversation with multiple Apple users.
And if you so happen to have multiple Apple devices, you can receive messages on all of them. You will receive messages whether you are using your iPad, your iPhone or your Macbook.
How to turn read receipts on or off in iMessage for iPhone or iPad ?
Read receipts let your contacts see whether or not you’ve viewed their iMessages. While some people may consider read receipts creepy, others may find them useful for work and business situations.
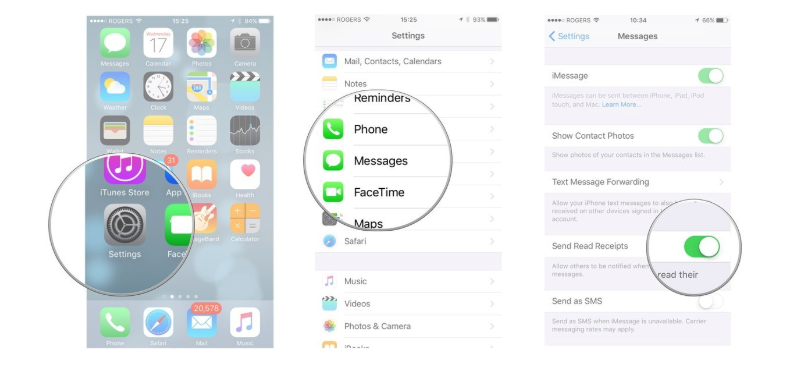
- Launch Settings from your home screen.
- Tap Messages.
- Tap the Send Read Receipts On/Off switch. The switch will be green when it’s been turned on.
How to turn message previews on or off in iMessage for iPhone and iPad ?
By default, iOS will show a short preview of your iMessage on both the Lock screen and Home screen. If you’d rather have your notification only show the sender’s name, however, you can easily adjust the settings of the Messages app to do so.
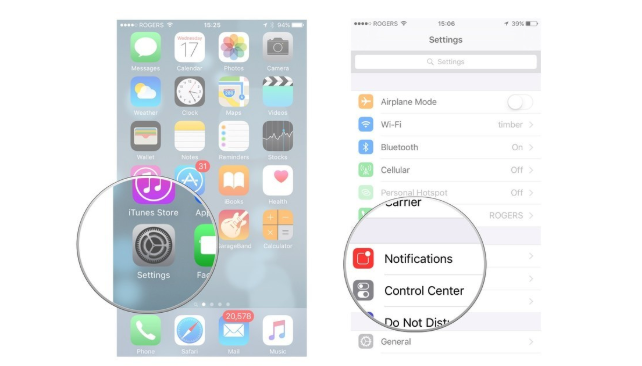
- Launch Settings from your Home screen.
- Tap Notifications.
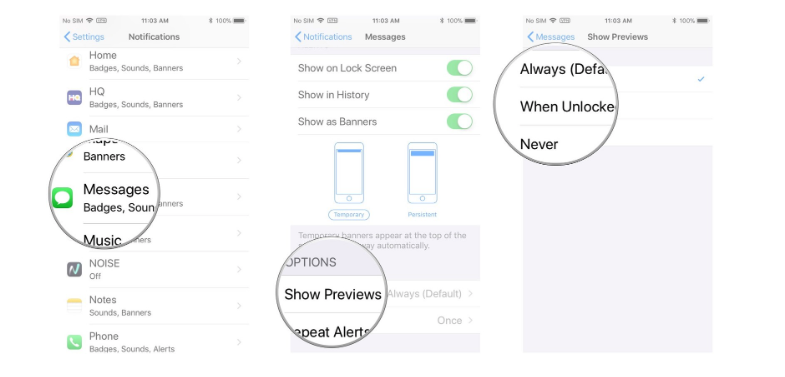
- Tap Messages.
- Tap Show Previews.
- Tap the option you’d like. Your options are as follows:
- Always
- When Unlocked (Default)
- Never
How to enable or disable SMS/MMS relay on your iPhone
- Launch the Settings app on your iPhone.
- Tap on Messages.
- Tap on Text Message Forwarding.
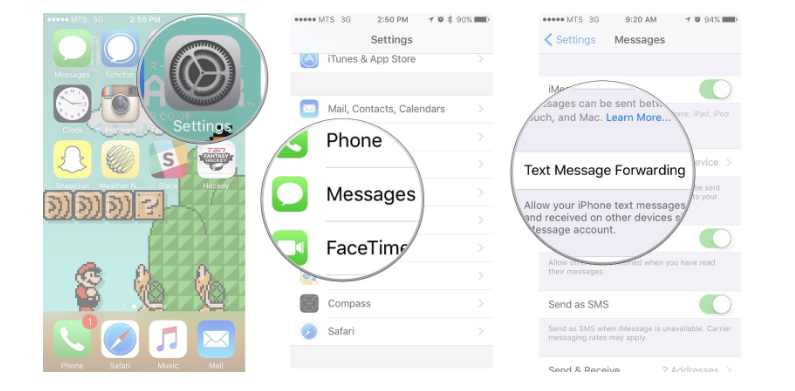
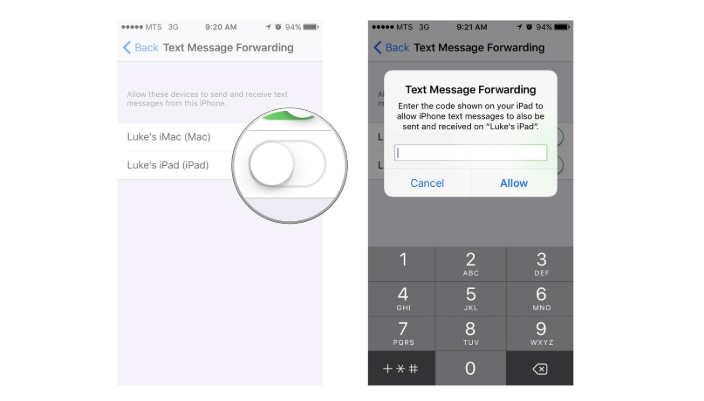
- Turn On the option for forwarding to your iPad.
- Wait for your iPad to pop up an authorization code.
- Enter the authorization code on your iPhone.
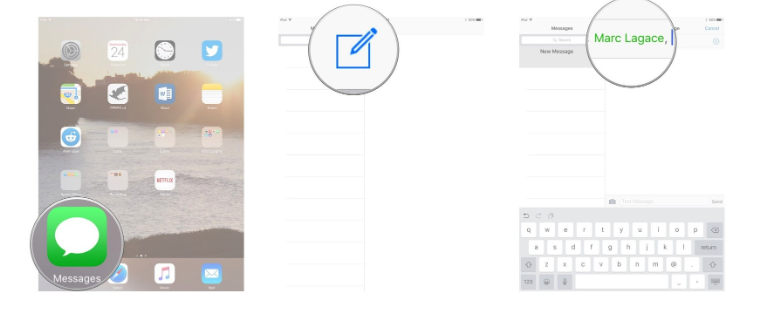
How to send SMS/MMS on your iPad
Sending SMS/MMS on the Mac is just like sending an iMessage.
- Launch the Messages app on your iPad.
- Tap on the Compose Message button.
- Enter the phone number or name of the contact you want to text.
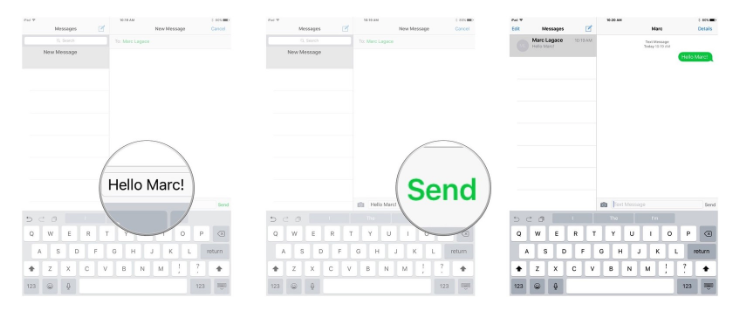
- Type your message.
- Hit Send.
How to reply to SMS/MMS on your iPad
Receiving SMS/MMS on the iPad is also identical to receiving an iMessage.
- Tap on a notification to quick reply or be taken straight to the Messages app.
- Launch the Messages app at any time to view or reply to an SMS/MMS.
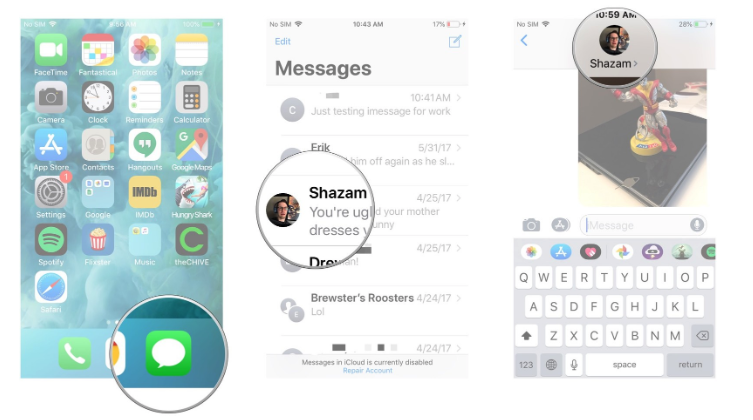
How to send a new photo or video using Messages on iPhone or iPad
- Launch the Messages app on your iPhone or iPad.
- Tap on the conversation in which you’d like to send a photo.
- Tap on the camera button to the left of the text field. The camera app will launch.
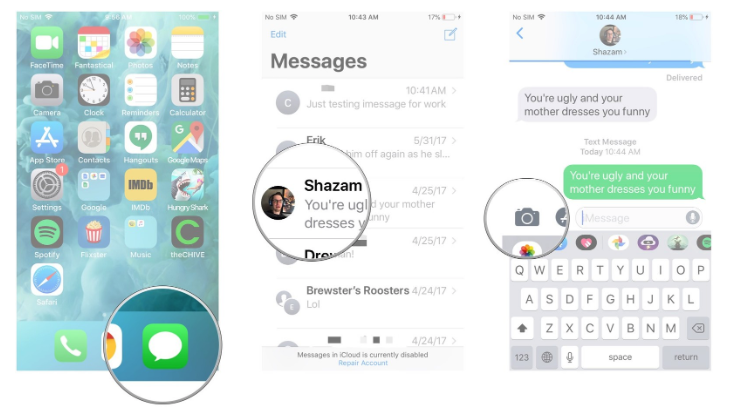
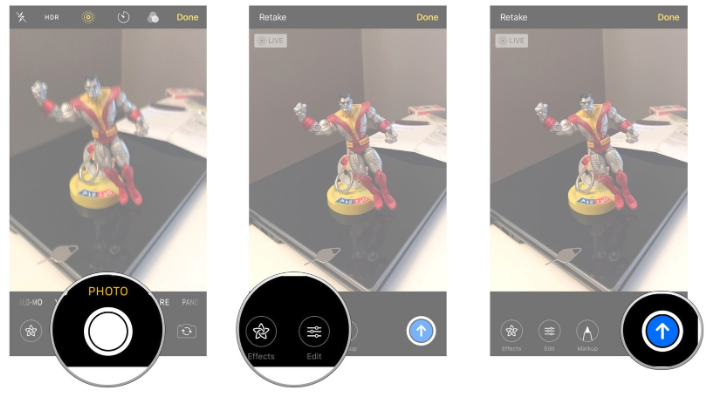
- Tap the shutter button when you’re ready to take your photo or swipe left or right to take a video, panorama, or other image, and wait a moment. A new screen will appear with a blue button in the bottom right corner.
- Edit or markup the photo as you’d like before sending it. You can apply filters, change the brightness, and more.
- Tap the blue send button in the bottom right corner.
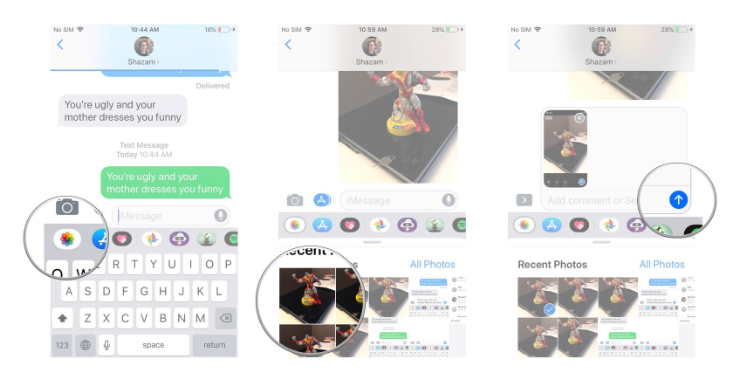
How to send an existing photo or video using iMessage on iPhone or iPad
It’s not just new photos and videos that have gotten an upgrade in iOS 10. Sending existing images or clips has also been improved.
- Launch the Messages app on your iPhone or iPad.
- Tap on the conversation in which you’d like to send a photo.
- Tap on the apps button to the left of the text field.
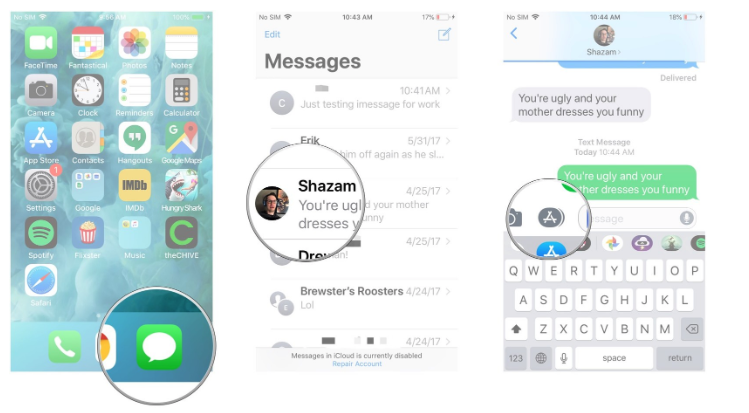
- Tap the Photos app button, which should be the left-most icon. It’s the same as the Home screen icon for the Photos app.
- Tap the photo or video video you’d like to send.
- Add a comment if you’d like.
- Tap the send button.
How to send and share location with iMessage for iPhone and iPad
iMessage integration with the Maps app means that not only can you send a map of a specific location to anyone in your contacts, but you can also send your current location or have your location sent to your contacts for a period of time. It’s a feature that might come in handy if you’re trying to meet up with friends at a festival or when traveling through an unfamiliar city.
How to send your current location using iMessage for iPhone and iPad
If you don’t want to constantly share your location but do want to send someone your current location, it’s easy to do.
- Launch the Messages app.
- Tap on the conversation in which you’d like to send your location.
- Tap on the name at the top of the conversation screen.
- Tap the Info button that appears below the name.
- Tap Send My Current Location.
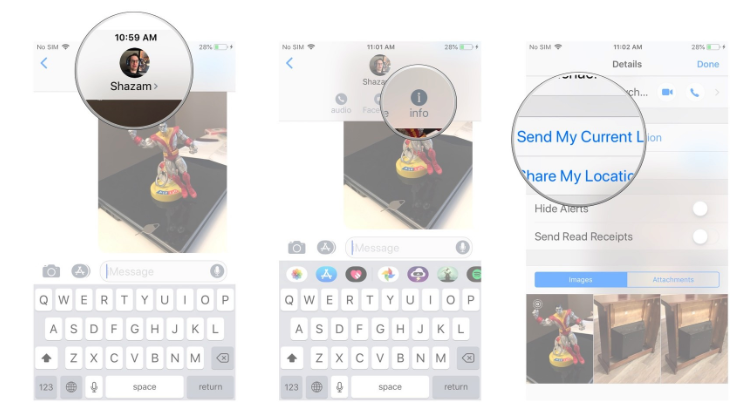
The person on the other end can then tap on the location in order to view it and even get directions.
How to share your location for a period of time using iMessage for iPhone and iPad
Apple has tied iMessage into Find Your Friends, so if you want to share your location for an hour, the rest of the day, or the rest of time, that’s also an option.
- Launch the Messages app.
- Tap on the conversation in which you’d like to send your location.
- Tap on the name at the top of the conversation screen.
- Tap the Info button that appears below the name.
- Tap Share My Location.
- Tap the duration for which you’d like to share your location. You can choose from one hour, until the end of the day, or indefinitely.
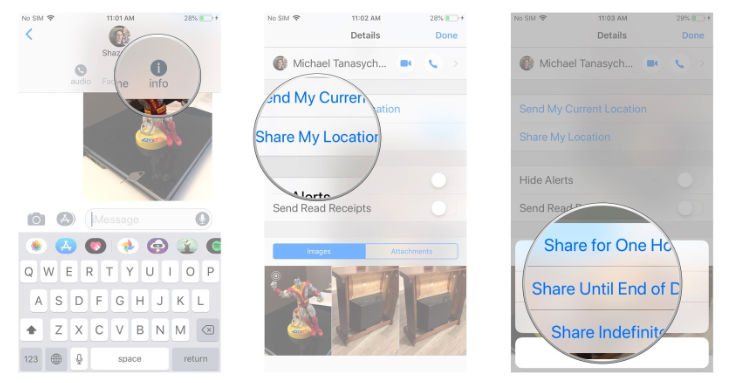
If you’d like to stop sharing your location before the end of the period you chose, follow the above steps and tap Stop Sharing My Location.
How to send any location from the Maps app with iMessage
If you’ve just looked up a location in Maps for iPhone or iPad — a great place to eat or fun place to meet — and want to share it with someone else, you can send it right over with iMessage.
- Launch the Maps app on your iPhone or iPad.
- Find the location you’d like to share. If you’d like to share your current location, just tap on the location arrow in order to locate yourself.
- Swipe up on the bottom of the screen.
- Tap on the Share button.
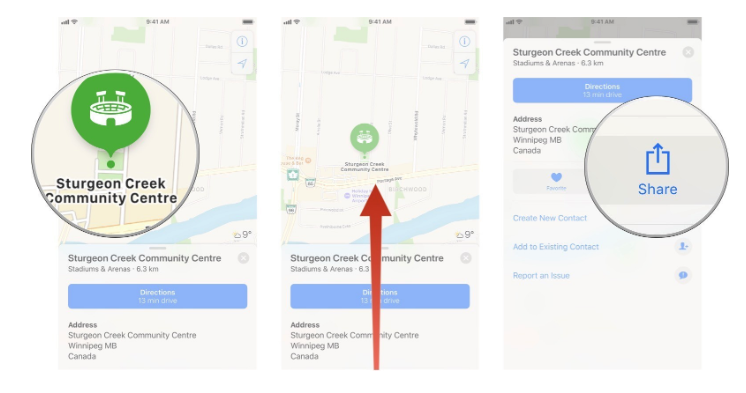
- Tap on Message.
- Type the name of the person with whom you’d like to share your location.
- Tap Send.

How to delete, block, mute, or report spam iMessages on iPhone and iPad
You can’t delete iMessages or SMS/MMS on someone else’s iPhone or iPad — so always be careful what you send — but you can delete any record of them from your iPhone or iPad. So, whether you don’t want to be reminded of an embarrassing or hurtful text, or you want to get rid of storage-consuming pictures and videos, the Messages app lets you wipe them out or set them to expire automatically.
And just because anyone can send you an iMessage on your iPhone or iPad doesn’t mean you have to let them. If you’re getting messaged too often, if you keep getting messages meant for someone else, of if — ugh! — you’re getting spam, you can absolutely take action again it. Mute, block, and reporting are all here for you.
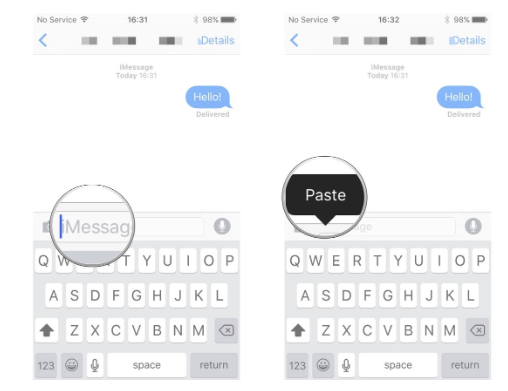
How to copy an iMessage (or SMS) on iPhone and iPad
Copying is handy for a time when you only need to move the text from an individual message to the clipboard and paste it somewhere else. That can be in a new or existing message or into a completely different app. This is the option you want to use if you need to use the content in a way other than forwarding it in another iMessage or SMS.
- Launch the Messages app on your iPhone or iPad and find the message you’d like to copy.
- Tap the conversation you want to copy messages from.
- Tap and hold on the message you wish to copy.
- Tap Copy.

- Tap and hold the message field in the conversation that you’d like to paste in.
- Tap Paste.
How to forward messages on iPhone and iPad
You can forward any iMessage — or SMS or MMS — to anyone else in your contacts.
- Launch Messages from your Home screen.
- Tap the conversation that contains the message(s) you’d like to forward.
- Tap and hold the message you’d like to forward.
- Tap More….
- Tap on the forward button in the lower right-hand corner.
- A new message will populate, pre-filled with your forwarded text. Just fill in the recipient and send it on its way!
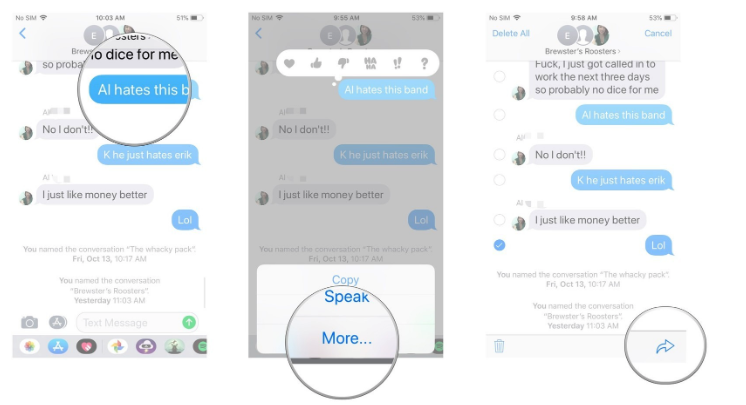
Keep in mind you can forward more than one message at a time. Just tap all the ones you want to forward before you tap the actual forward button!
How to send a voice memo through iMessage on iPhone and iPad
The built-in Voice Memo app can be handy for recording lengthy thoughts or instructions, and iMessage is a great way to share them.
- Launch the Voice Memo app on your iPhone or iPad.
- Tap on the voice memo you’d like to send in order to expand it.
- Tap on the Share button.
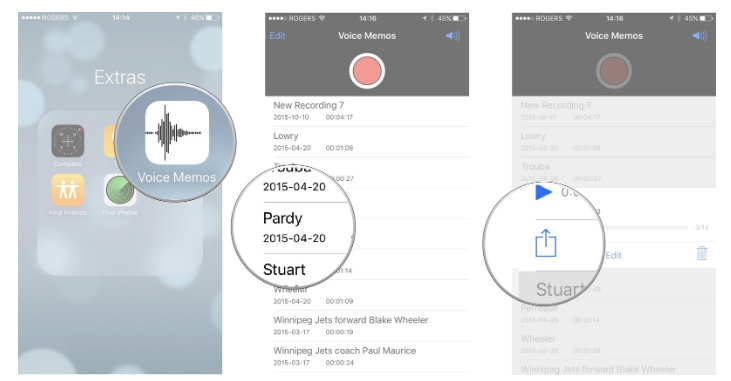
- Tap on the Message icon.
- Type in the name of the person you’d like to send it to and select them.
- Tap on the Send button.
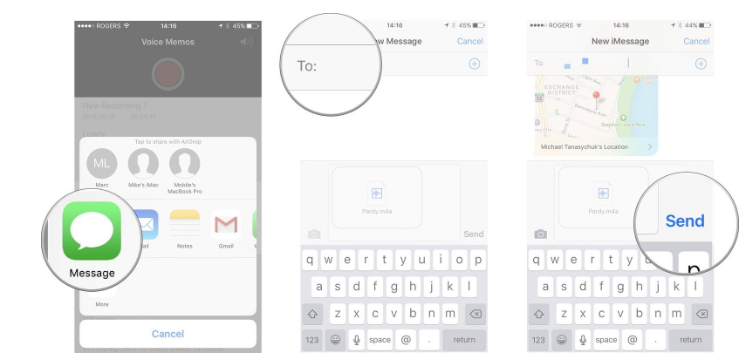
Once received, the Voice Memo will play like any standard Apple audio file.
How to Install Sticker Packs in iMesssage?
Sticker packs can be installed as standalone applications through the iMessage App Store or they can be downloaded as add-ons to full iOS apps, but either way, getting them onto your device uses these steps.
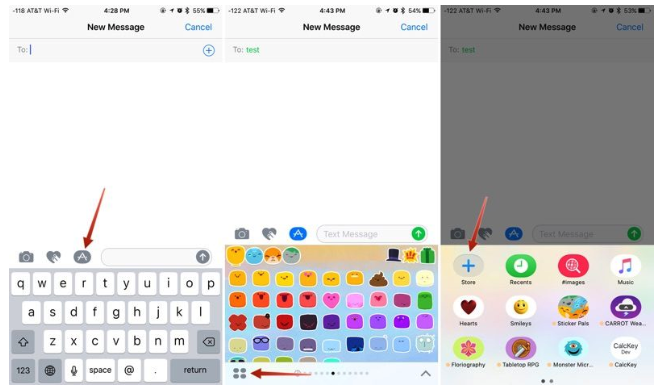
- Open an existing conversation thread in Messages or start a new conversation.
- Tap on the App Store icon next to the conversation box and then tap on the four dots to open your app drawer, which houses all installed apps.
- Tap the “+” icon to access the iMessage App Store.
- In the “Featured” section, tap “Get” or and then “Install” to download a sticker pack, or tap on the purchase price to buy an pack that costs money. Passwords and Touch ID authentication are required, just as in the standard App Store.
- Tap on the “Manage” tab to install sticker packs (or other apps) that are available as iOS add-ons. Installation is done by setting the toggle to on (green), while removing an a sticker pack is done by turning the toggle off.
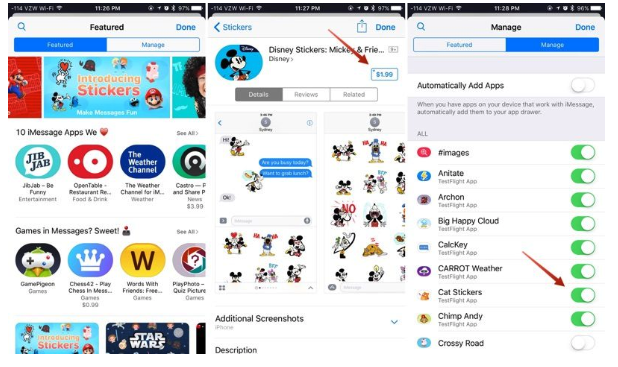
- OPTIONAL: In the “Manage” tab, toggle on “Automatically Add Apps” to let all iOS apps that have an iMessage component install in Messages automatically.
- Click “Done.” The newly installed sticker pack is now available in your app drawer. Access it by opening the app drawer (four dots icon) or swiping left or right through your installed apps.
Managing and Deleting Stickers
There are several gestures that can be used to manage your stickers. A single tap will display a sticker full screen, as will a 3D Touch press on the iPhone 6s and later.
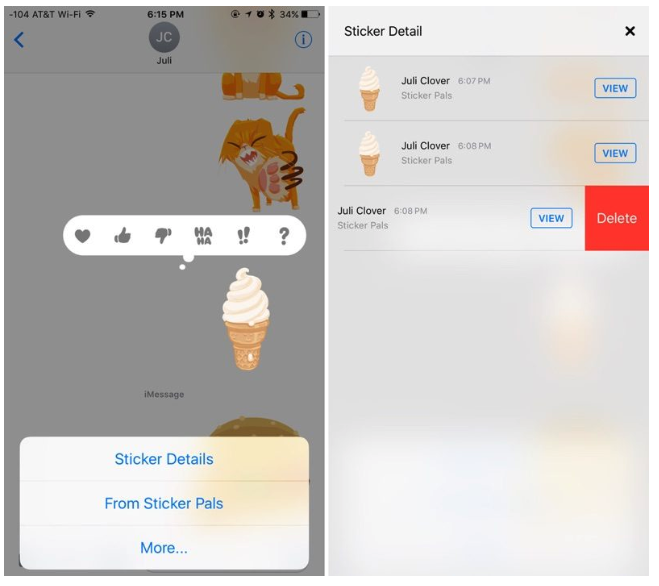
Use a long press on a sticker to bring up your message reaction menu and a set of management options. This menu displays where a sticker is from so you can download the sticker pack from the iMessage App Store if it’s not already installed, and it has tools for deleting layered stickers. To delete:
- Long press on a layered sticker or a sticker that’s been placed on an incoming message or photo.
- Choose the “Sticker Detail” option. All stickers that have been placed on a particular photo, message, or initial sticker will be displayed.
- On the sticker you want to delete, swipe to the left and choose then tap the “Delete” button.
- The sticker is removed from your device and from the device of the person you were communicating with and you’re now free to add additional stickers.
Add a sticker to a conversation
- Open Messages and tap
 to start a new message. Or go to an existing conversation.
 - Swipe left or right over the app drawer to find the one that you want to use.
- Then tap the app to open it.
If you want to add a sticker, touch and hold the sticker, then drag it to the message bubble. The sticker will automatically send when you add it to the message. You can also pinch or zoom to resize stickers before sending.
If you receive a message with a sticker from an iMessage app that you don’t have, touch and hold the sticker, then tap Sticker Details to view the app in the App Store.
How to add MojiLaLa stickers on iMessage
1) Open an existing conversation thread in Messages or start a new conversation.
2) Tap the “App” button to the left of the message field.
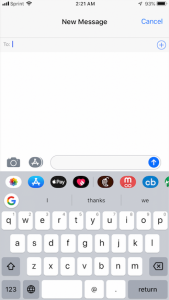
3) Search “Stickers for photos & for text”
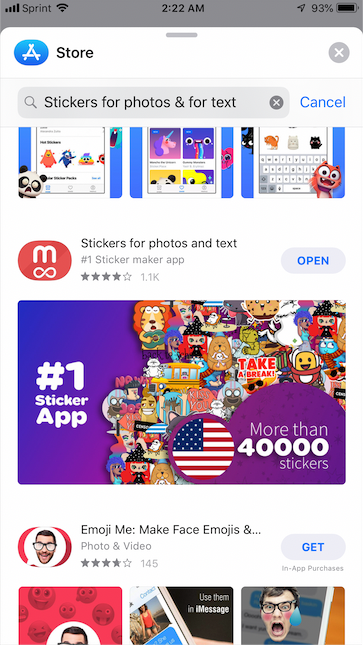
4) Tap to download button
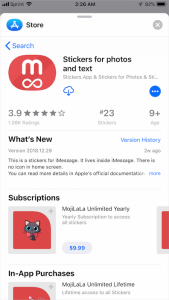
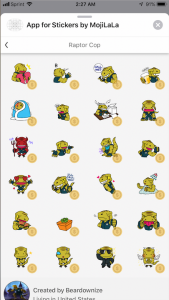
5-) Back to iMessage screen and tap to “MojiLaLa” icon to use stickers

6-) Enjoy with more than 36000 stickers! 🙂
Sticker Compatibility
Stickers are only going to display appropriately on devices running iOS 10 and macOS Sierra, so sending stickers to friends who are using Android devices or older versions of iOS won’t work quite the same. On these devices, stickers are simply displayed as an image or GIF might be displayed and all layering is ignored.
Sticker packs can be created using Xcode with no coding experience required, so not only are developers going to be coming out with sticker packs, but artists can make them too. Expect to see hundreds of available sticker packs in the near future in addition to the built-in Hearts, Smileys, Hands, and Classic Mac stickers made available by Apple.